
Here's a great little
project for kids or adults. These Art Blocks are fun little
decorations for all the different seasons and holidays, and can easily be
adjusted to hang on a wall. One of the best parts about this project is that it
uses mostly scrap materials - no expensive supplies! Have fun!
 |
| The finished project! |
 MATERIALS: Scrap piece of wood - any
size square or rectangle - approximately 1/4 inch thick; 2" Dowel piece
for stand OR picture frame hanger; Fabric scrap(s); Paper scraps; Buttons or
other embellishments; Mod Podge; Pinking shears; Scissors; Hot glue gun &
glue; Sandpaper
MATERIALS: Scrap piece of wood - any
size square or rectangle - approximately 1/4 inch thick; 2" Dowel piece
for stand OR picture frame hanger; Fabric scrap(s); Paper scraps; Buttons or
other embellishments; Mod Podge; Pinking shears; Scissors; Hot glue gun &
glue; Sandpaper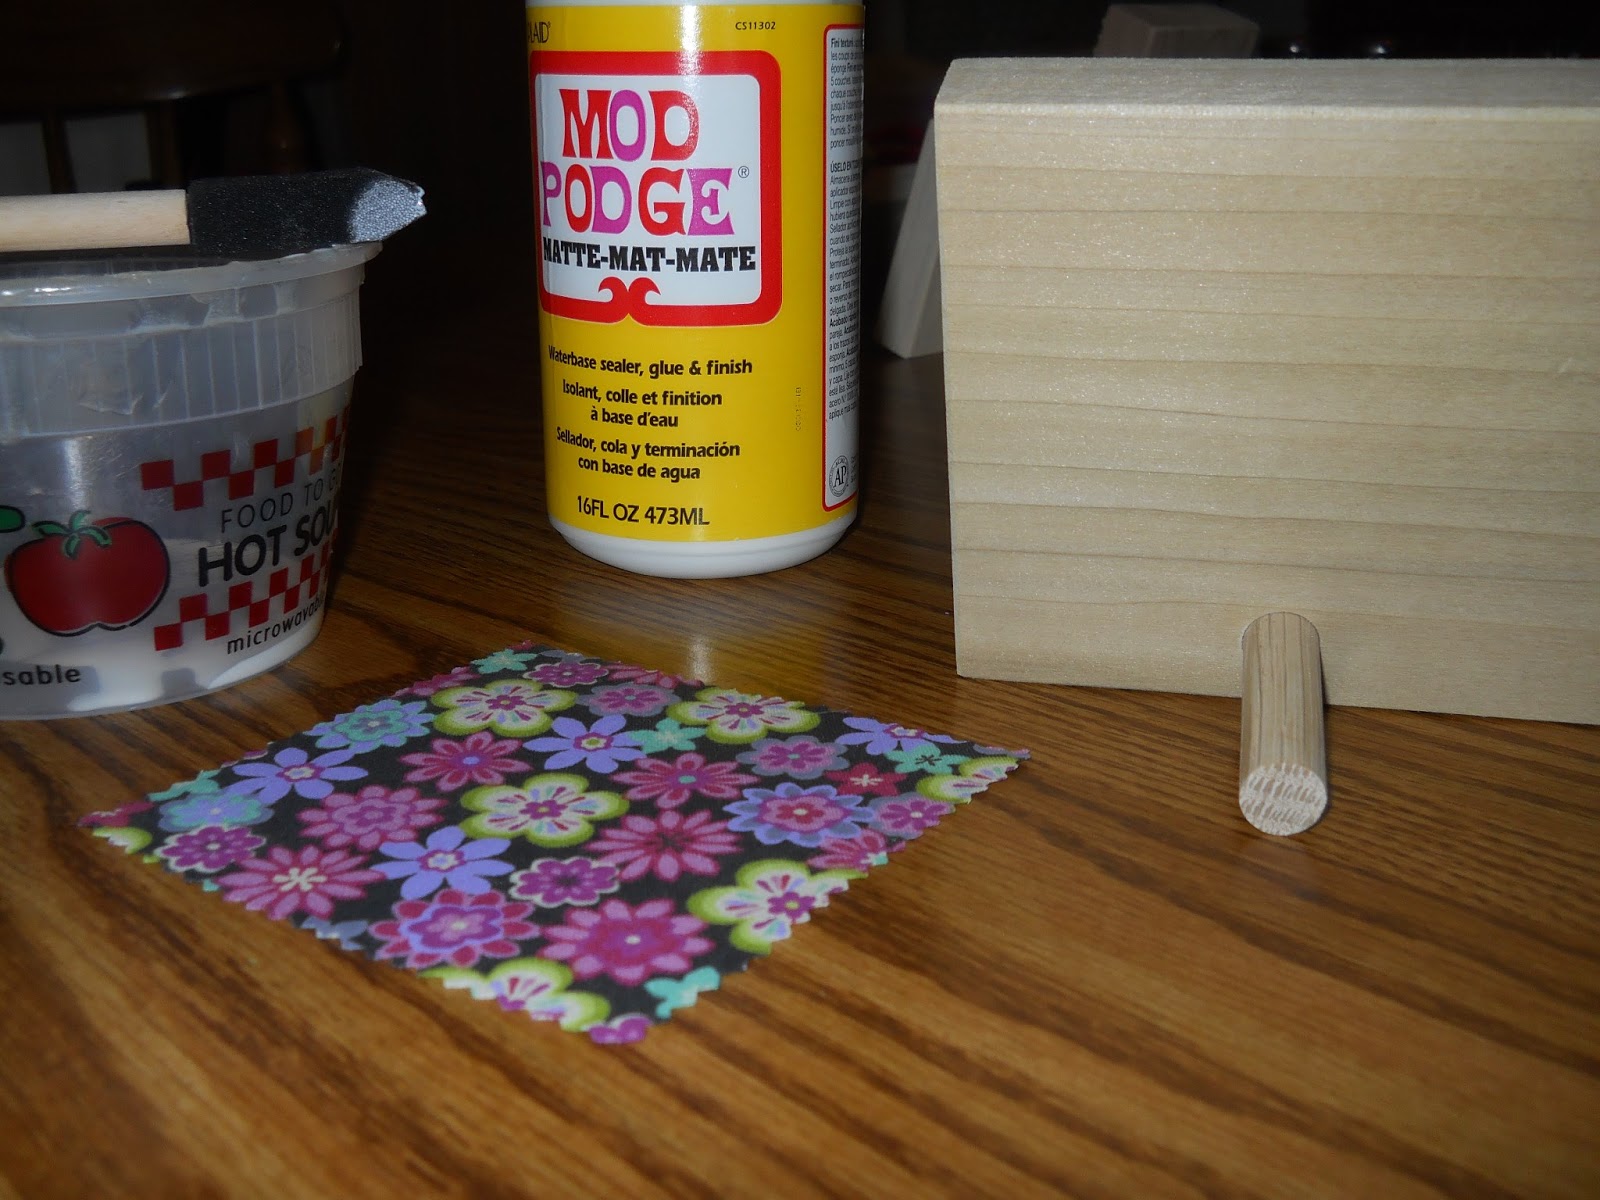 Step 1: Make sure all the edges of your block of wood are smooth.
If you're planning on using a dowel for a stand, now is a good time to attach
it. Just drill a hold on the back of your wood block near the bottom and insert
dowel at about a 15-degree angle. (Not a bad idea to glue your dowel into the
hole, unless you want it to be a removable stand.) If you'd prefer to hang your
project, you can add a picture frame hanger to the back at any time.
Step 1: Make sure all the edges of your block of wood are smooth.
If you're planning on using a dowel for a stand, now is a good time to attach
it. Just drill a hold on the back of your wood block near the bottom and insert
dowel at about a 15-degree angle. (Not a bad idea to glue your dowel into the
hole, unless you want it to be a removable stand.) If you'd prefer to hang your
project, you can add a picture frame hanger to the back at any time.

Step 2: Use pinking shears to cut out a piece of fabric just
slightly smaller than the surface of your block's front. Attach the fabric to
the block with mod podge.
 Step 3: Add any paper or other flat embellishments on top of the
fabric layer. Mod podge will also stick these nicely to your block. (If you'll
be adding buttons or other dimensional objects, these go on later.)
Step 3: Add any paper or other flat embellishments on top of the
fabric layer. Mod podge will also stick these nicely to your block. (If you'll
be adding buttons or other dimensional objects, these go on later.)
Step 4: Add a top coat of mod podge over all the flat objects on
the front of your block. Covering the edges and back with mod podge are
optional, but do finish it off nicely.
Step 5: After the final coat of mod podge is dry, add any other
embellishments to your block (i.e. buttons, ribbons, etc.) Hot glue works well
for this.
Step 6: Have fun
decorating with your Art Block!